


UI Testing iOS Application with EarlGrey

A unique testing framework in iOS App Development. Before jumping toward the EarlGrey implementation in your iOS application, Let’s first know what EarlGrey is and why it is used in the app.
What is EarlGrey?
EarlGrey is a local iOS UI robotization test structure that empowers you to compose clear, succinct tests.
With the EarlGrey system, you approach upgraded synchronization highlights. EarlGrey consequently synchronizes with the UI, arranges demands, and different lines; yet at the same time permits you to physically actualize modified timings, if necessary.
EarlGrey’s synchronization highlights help to guarantee that the UI is in a consistent state before activities are performed. This enormously builds test dependability and makes tests profoundly repeatable.
EarlGrey works related to the XCTest structure and coordinates with Xcode’s Test Navigator so you can run tests straightforwardly from Xcode or the order line (utilizing xcodebuild).
EarlGrey Features:
EarlGrey offers features that make testing your application simpler and increasingly viable.
Synchronization
Typically, you shouldn’t be concerned about synchronization as EarlGrey automatically synchronizes with the UI, network requests, main Dispatch Queue, and the main NSOperationQueue. To support cases where you want to wait for some event to occur before the next UI interaction happens, EarlGrey provides Synchronization APIs that allow you to control EarlGrey’s synchronization behavior. You can use these APIs to increase the stability of your tests.
Visibility Checks
Taps and swipes are performed using app-level touch events, instead of using element-level event handlers. Before every UI interaction, EarlGrey asserts that the elements being interacted with are actually visible and not just present in the view hierarchy. EarlGrey’s UI interactions simulate how a real user would interact with your app’s UI, and help you to find and fix the same bugs that users would encounter in your app.
Install and run
You can add EarlGrey to Xcode projects in three ways: using CocoaPods, Carthage or Manually through the Xcode Project.
CocoaPods installation
Step 1: Set up a Unit Testing target
- To create a new Unit Test (XCTest) target, select your project in the Xcode Project Navigator, and then click Editor → Add Target… from the menu.
- In the Add Target window, select iOS → Test → iOS Unit Testing Bundle:
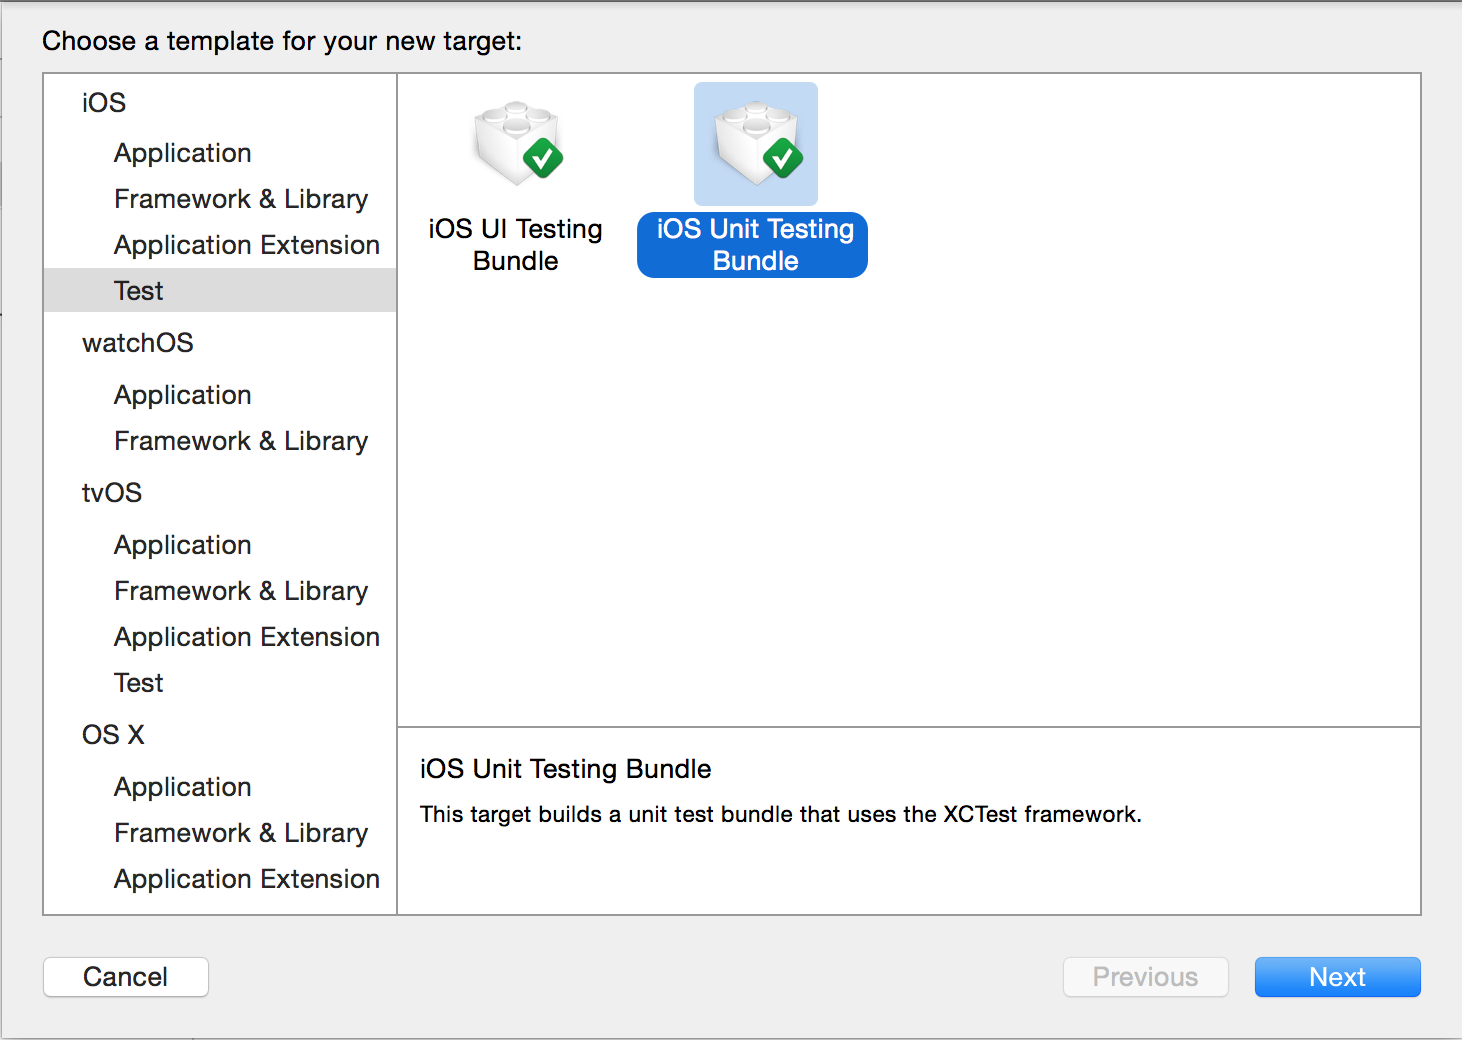
Click Next → “Add a Test Target Name” → Finish.
- The test target must have a Scheme associated with it. To add one, go to Product → Scheme → Manage Schemes, press the plus (+) sign, and then select the target from the dropdown menu. Ensure the Container is set to the app under test.
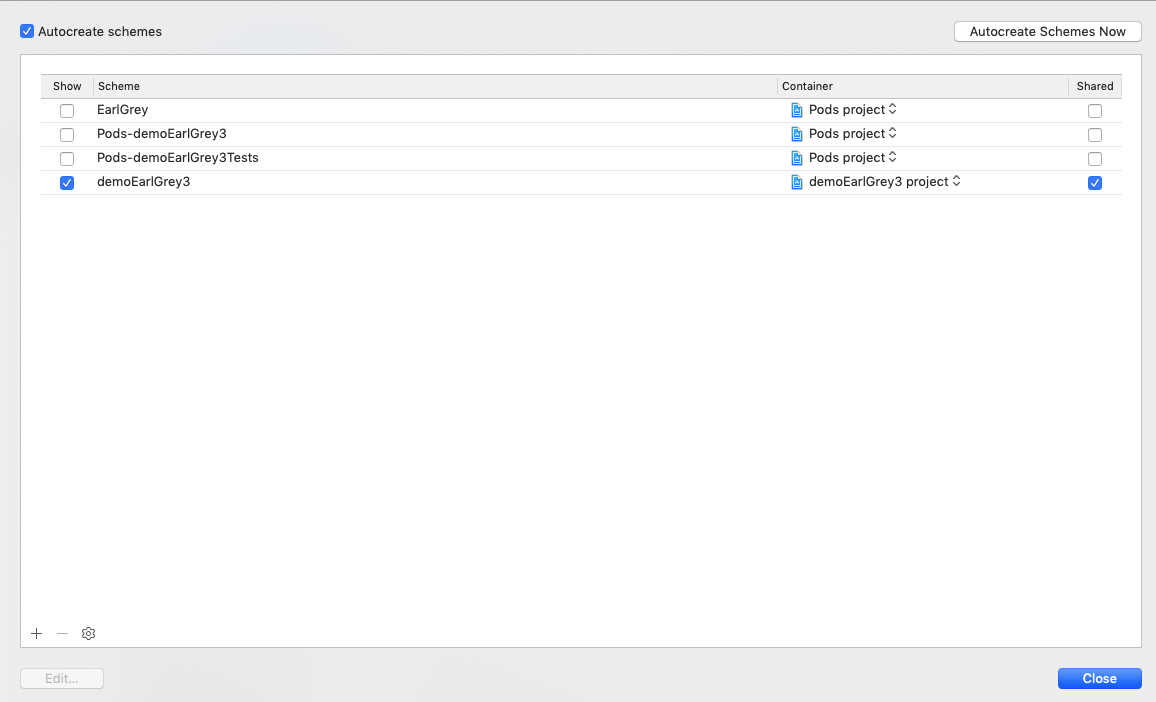
And click on Close.
Step 2: Add EarlGrey as a framework dependency
- Install the EarlGrey gem by doing gem install earlgrey. See the installing Ruby section section if your Ruby isn’t up to date.
- In the test target’s section in your Podfile, add EarlGrey as a dependency.

Once finished, do a pod install. For compatibility between different versions, please see this doc. To download a particular version of the gem, use gem install earlgrey -v x.y.z.
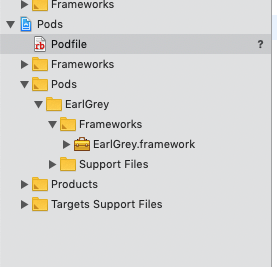
Step 3: Open the workspace and verify that you see EarlGrey.
After you successfully run the pod install command, open the generated workspace and find EarlGrey installed in the Pods/ directory. The generated Pods/ project should look similar to:
Set Up and run your first test
Because EarlGrey is based on XCTest, creating your first test in Xcode is as easy as creating a new Unit Test Case Class. Be careful not to confuse Unit Test Case Class with UI Test Case Class. UI Test Case Class uses the new UI Testing feature added to XCTest and isn’t yet compatible with EarlGrey.
- Ctrl+Click the folder for your app’s source files, and then select New file…. The following dialog will appear:
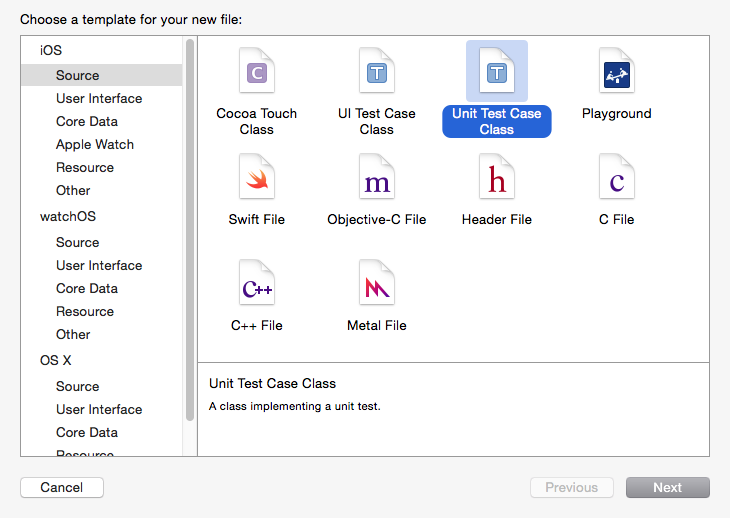
2.Select Unit Test Case Class, and then click Next. On the following screen, type the name of your test case.
3.On the next screen, make sure that the test is associated with the Unit Test target.
4.Xcode will create a new test case for us but we won’t need much of it. Let’s change the code to leave just a single test method and include the EarlGrey framework.
For Swift Tests:
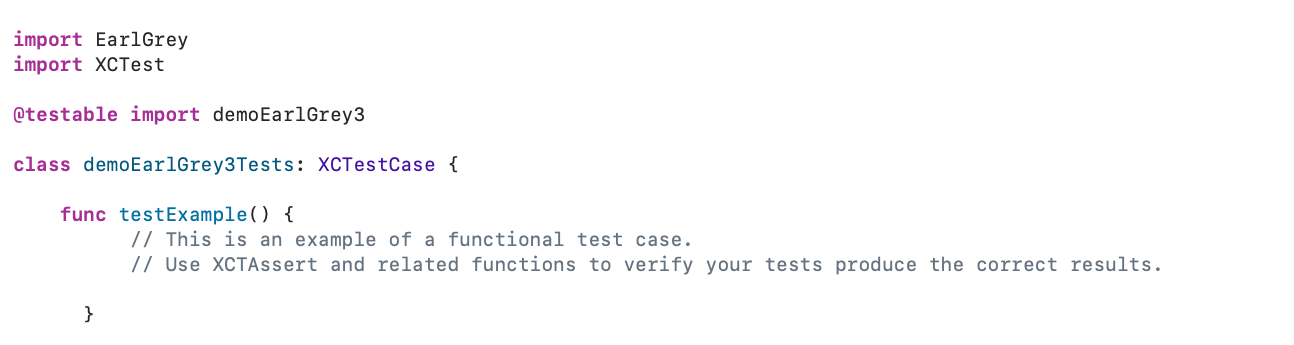
For Objective-C Tests:

- Now let’s add a simple EarlGrey assertion that checks for the presence of a key window and asserts that it is displayed.
Install Ruby
If you already have a working Ruby install, skip this part.
- Install rbenv

- Load rbenv automatically by appending the following to ~/.bash_profile or ~/.zshrc

- Source bash profile or zshrc:

- Run the following commands:
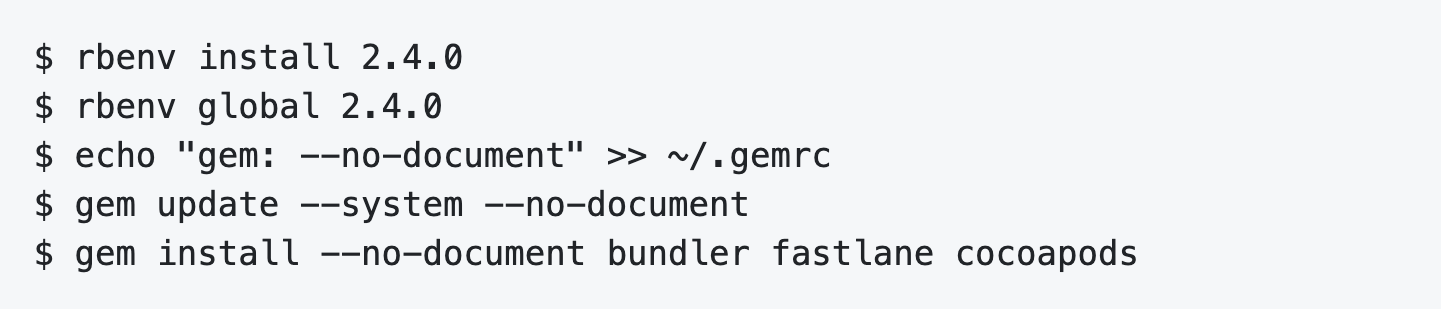
-
Now manually run rbenv init
-
If Ruby still isn’t on your path, try reinstalling ruby:

Test the app, you will be seeing the test case results in the output section of Xcode. For any query, kindly feel free to contact us. We will be happy to help. For the full project, kindly click on below github link. Github: https://github.com/manekdilip/EarlGrey_Test_iOS_Swift
ManekTech understands the concept and begin with strategizing the needs of the client and dig out the best from our iOS App development service.
More articles on the topic
An app's user base using Firebase Analytics, a free and unlimited analytics solution. You'll be able to learn who your users are and how they interact with your app.
7 Min ReadFeb 27, 24
Nikhil Solanki
Mobile Lead at Manek Tech
Data Visualization technologies provide us with a proliferation of insights into the data obtained. Google and Microsoft, for instance, gather and utilize Big Data to shape the future of their commercial operations.
4 Min ReadFeb 29, 24

Ruchir Pandya
Delivery Head of Web at Manek Tech