Video conferencing is a vastly used feature in the business world since its launch. Especially after the booming of the internet in last decade, entrepreneurs want to include video conferencing features in the website and mobile applications. There are lots of apps and website available in market today, which provides facility to connect with person or group over video conference. Many readymade plugins are available in the market today to integrate video conferencing feature in website or app, but it costs very high, but WebRTC is one of the widely used open-source technology available that allow us to integrate video conferencing functionality.
What is WebRTC:
WebRTC is an open source(free) technology that allows us to integrate real-time video calling feature in the website as well as in applications. The Major part behind easy integration of WebRTC is an open web standard and JavaScript API available for all major browser in market, same is available as SDK to integrate into mobile applications.
WebRTC is multipurpose technology that provides functionality like identity management, file exchange, interfacing with legacy telephone systems.
WebRTC allow us to communicate directly from 2 browsers without interacting with the server once the connection is established. So let us have a look how it is work in web?
HOW WebRTC Works:
WebRTC is a little different compared to normal website rendering, it requires 2 types of interaction which is signaling and media which transmit over network.
Signaling is used to set connection between 2 user using Public IP of user, once connection established media can be transmitted between 2 users. Media can be audio/video or file transfer.
All major things are done by API / SDK provided by WebRTC documentation; we just need to properly use that functionality to make communication.
Real-time Approach:
Prerequisite:
1. Basic Knowledge of HTML, JS and NodeJS.
2. Latest NodeJS installed in your System.
3. 2+ Device for testing application(as you can not use 1 webcam in 2 browser window)
What you need to do it?
1. You need SSL certificate for testing.
2. Setup basic Node server for communication.
3. Setup Node server to serve our web pages on https.
4. Write code to implement Video call and Chat feature.
5. Run both server for testing.
Using the code.
1. Create SSL certificate for testing.
You need to use SSL certificate to run web app, otherwise it might possible that browser may not allow some features due to security / user permission issue.
To get free SSL certificate for our app we’ll use Open SSL. Use following steps to get your own certificate or you can use certificate provided in our demo app and skip this step.
1. Open Git Base or CMD/Terminal in your System.
2. Type following command and press enter.
openssl req -newkey rsa:2048 -new -nodes -x509 -days 3650 keyout key.pem -out cert.pem
3. After triggering command, you’ll see some questions, write answers as per your choice but make sure you’ll write localhost in Common name.
4. You will see 2 file created in folder, we’ll use this in 2ndstep while coding.
2. Create Server for communication.
1. Create following structure of folder and paste created certificate in that folder.
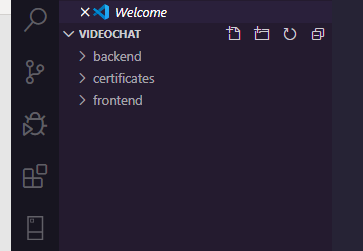
2. open cmd/terminal or Git base in backend folder.
3. Write following command in that.
npm init
4. Above command will ask you few questions, please write appropriate things as per your choice, make sure you’ll write entry point name properly, we’ll use backend-server.js as entry point in example.
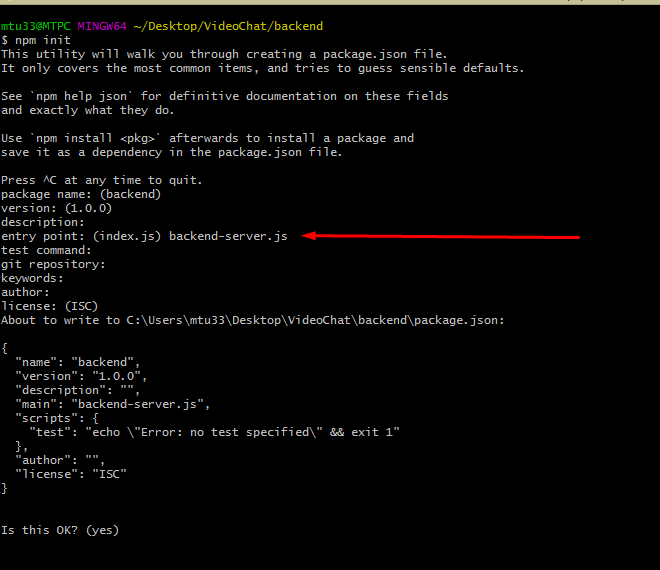
5. Write following command in cmd to install required package for communication, --save is required option so it will be se as dependency in package json.
npm install peer –save
6. Create backend-server.js file in folder and write following code into it.
7. Open backend-server.js in your favorite IDE and write following code.
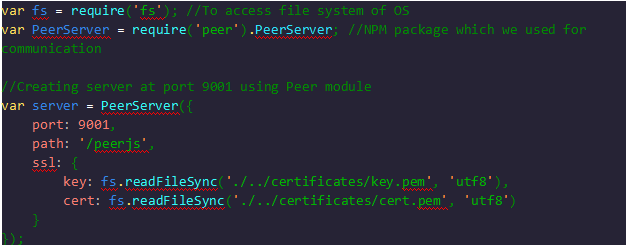
8. That’s it for backend code, we’ll now create frontend side in next step.
3. Create frontend server to serve webpages.
1. Goto folder frontend.
2. Open cmd and write following command in that
npm init
3. It will ask you same question as backend, provide appropriate answer and set entry point as frontend-server.js (you can keep other options as blank by pressing simple enter).
4. Write following command to add dependency.
npm install express --save
5. Create frontend-server.js file and open it in your favorite IDE.
6. Write following code in it to create server.
Following are required modules available in node, which we’ll use later, so we need to import it at top.

7. Create index.html file which we just used in above steps, basically we need 1 form and 2 video tags to perform entire operation, so let’s see how to do it.
Open index.html in IDE and write following code

Above code will be used to see your unique Peer ID for connection.
Let us add basic form module to enter data of user.
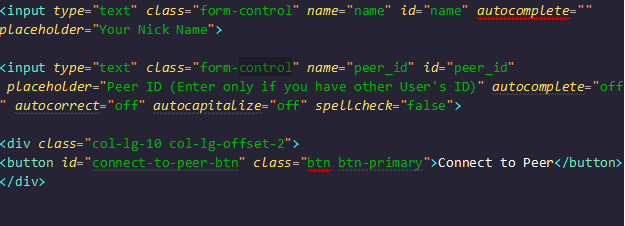
Above code will create basic form to enter username and peerId of other user to connect, we’ve not added any styling in this for now.
Now we need 2 video tags to view local and remote user’s video.

finally you need to add peer.js file as script dependency in html page, you can find it on cdn or download it locally and give local path as well.

Above you can see that we added script.js file, which we’ll create now. Make sure we’ll create resource/js folder folder.
Now let’s create Script.js inside resource/js folder, this part is hardest part from entire application and required little understanding of web RTC.

We will now connect to the backend server we just created using following code
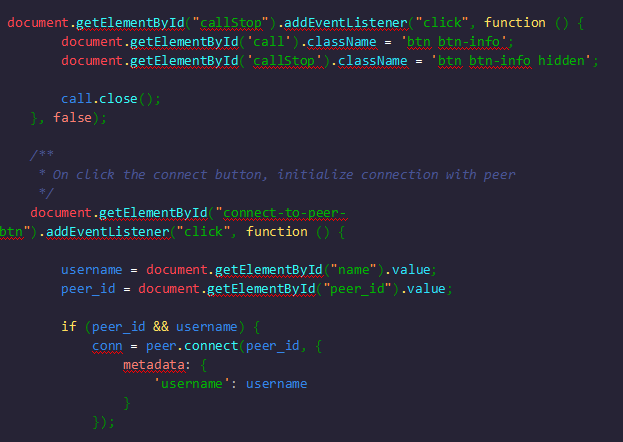
Now we connected with backend server, so we need to get Unique Id for our connection, so use following code to get that.

We’re showing unique id to HTML page using vanilla JS which we created, so user can easily check id.
We’ll now establish connection with other user using following.

Now we’ll handle event when someone calling us, so we can do appropriate action, either accept or reject.
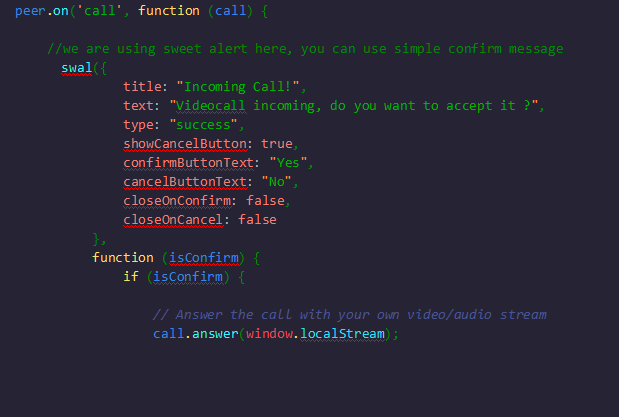
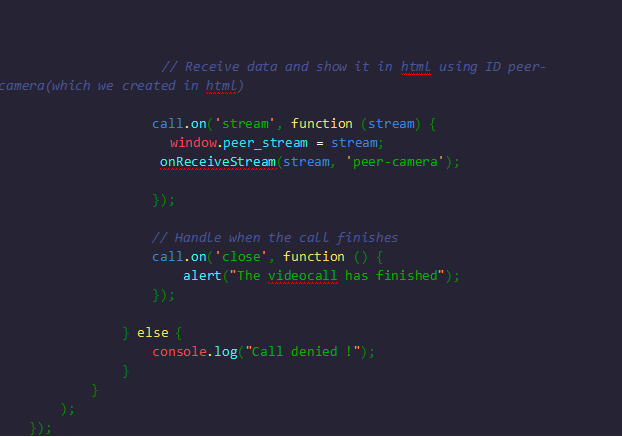
Now we are done with almost all required things, we will create necessary handlers as follow.
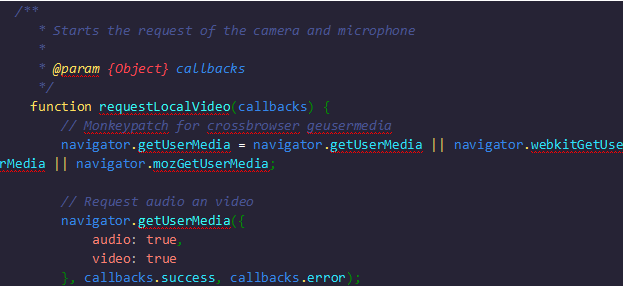
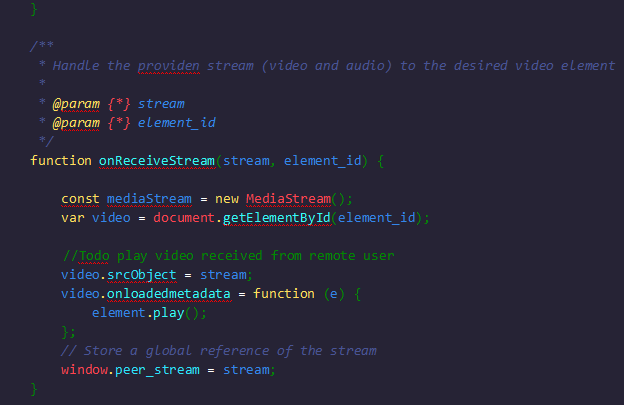
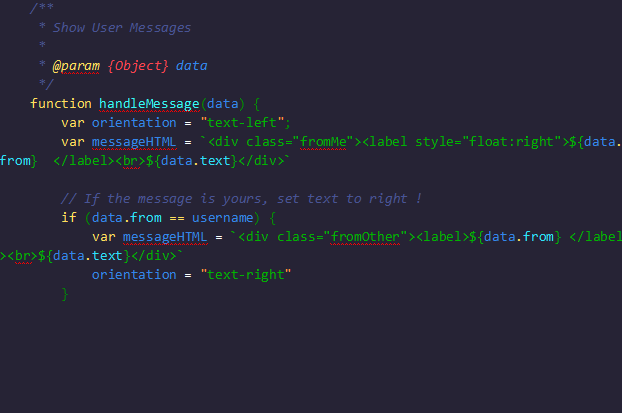
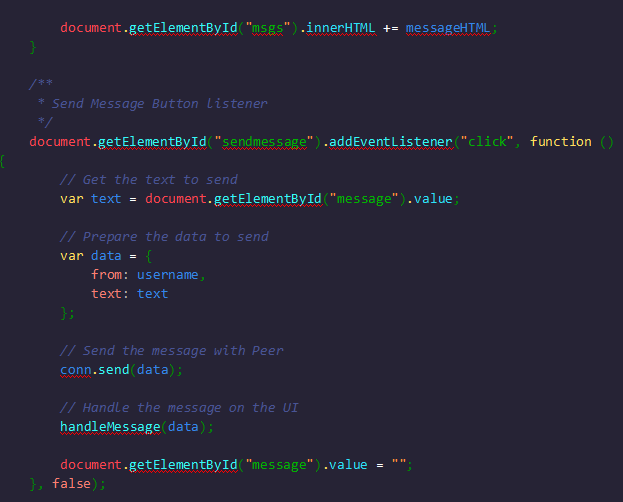
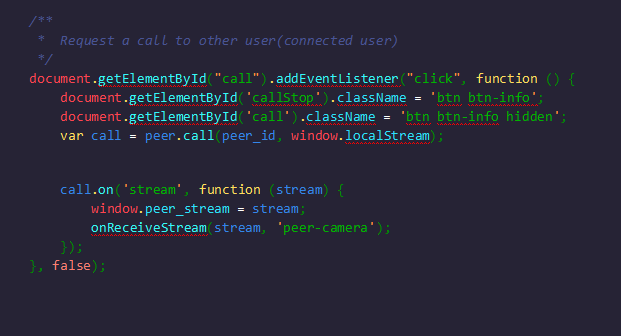

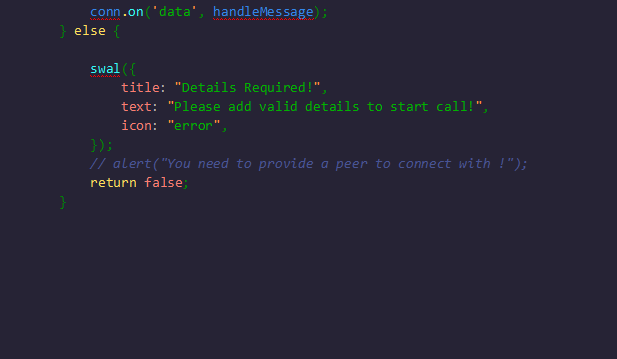
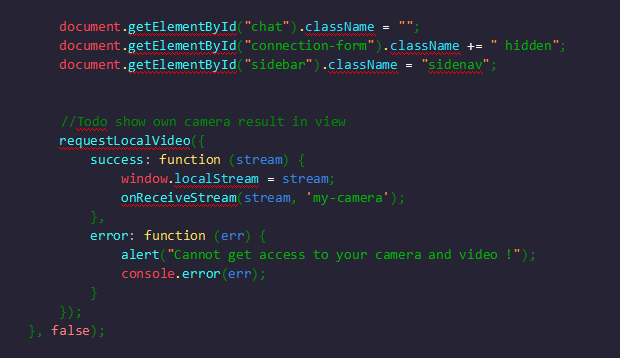
We are done with all required things, we are ready to run project.
1. Run both servers to run app.
1. Goto frontend server, open cmd and run “node frontend-server.js”.
2. Goto backend server, open cmd and run “node backend-server.js”.
We are successfully created video chat app, open browser in 2 different device and open
https://{{yourip}}/8888.
Final Output:
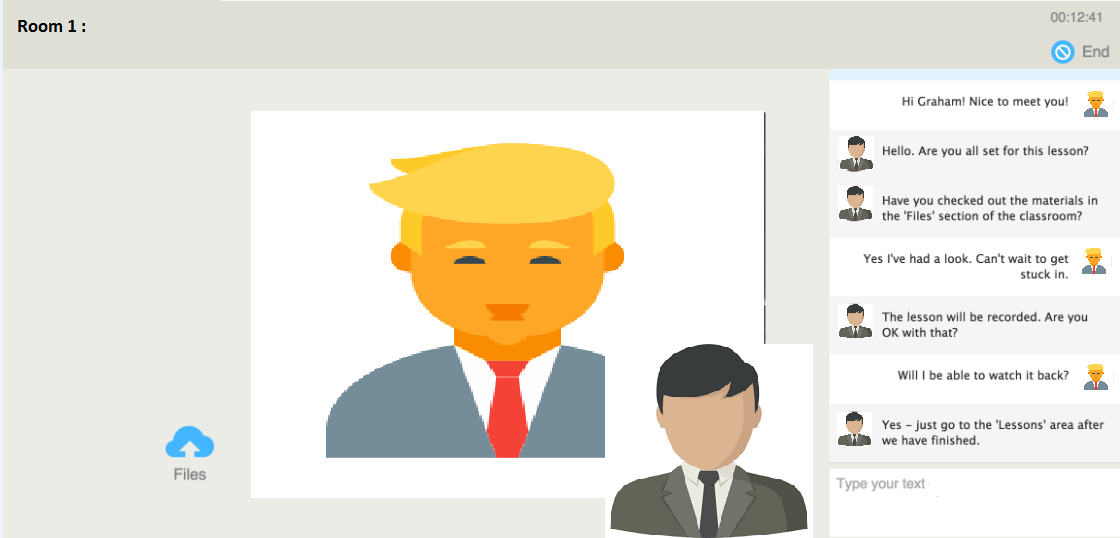
About Author
Subscribe to Our Newsletter!
Join us to stay updated with our latest blog updates, marketing tips, service tips, trends, news and announcements!


